
Mastering Aperture and Shutter Speed: A Guide for New Photographers
September 17, 2024
As a new photographer, understanding the fundamentals of photography is essential to taking control of your camera and capturing stunning images. Two key elements you’ll need to grasp are aperture and shutter speed. These are the building blocks of exposure, helping you control the light, depth of field, and motion in your photographs. While the concepts may seem technical at first, once you understand how they work together, you’ll be able to create images that reflect your creative vision.
In this blog post, we’ll explore what aperture and shutter speed are, how they influence your photos, how you can practice and master these techniques at home, and what challenges you may face as a beginner. Let’s dive in!
What Is Aperture?
Aperture refers to the opening in the lens through which light enters your camera. Think of it as the "pupil" of your lens. The size of this opening affects how much light hits your camera’s sensor, which in turn influences the exposure (brightness) of your image and the depth of field, which determines how much of your image is in sharp focus.
Aperture is measured in f-stops (e.g., f/2.8, f/5.6, f/11), and the lower the number, the larger the aperture (more light enters the camera), while a higher f-stop indicates a smaller aperture (less light enters).
Aperture and Depth of Field
Large Aperture (Small f-stop, like f/2.8): A large aperture creates a shallow depth of field, which means only a small part of your image will be in focus, while the background will appear blurred. This is often used in portrait photography to isolate the subject from the background.
Small Aperture (Large f-stop, like f/11 or f/16): A small aperture creates a greater depth of field, meaning more of the image from foreground to background will be in sharp focus. This is ideal for landscape photography, where you want both the foreground and distant elements to be clear.
What Is Shutter Speed?
Shutter speed refers to the amount of time the camera’s shutter remains open, allowing light to hit the sensor. It is measured in seconds or fractions of a second (e.g., 1/500, 1/30, 2 seconds). Shutter speed affects both the exposure and how motion is captured in your photos.
Fast Shutter Speed (e.g., 1/500 or 1/1000): A fast shutter speed freezes motion, making it perfect for action shots such as sports, wildlife, or moving subjects. Less light is captured, but motion will be crisp and clear.
Slow Shutter Speed (e.g., 1/30, 1/5, or several seconds): A slow shutter speed allows more light to enter and captures motion as a blur. This can be used creatively for effects like light trails, flowing water, or any situation where you want to emphasize movement.
How Aperture and Shutter Speed Work Together
Aperture and shutter speed are closely related and work together to control the exposure of your image. Along with ISO (which controls the camera"s sensitivity to light), these form the exposure triangle. Changing one element often means adjusting the others to maintain proper exposure. For example:
If you use a large aperture (f/2.8) to let in more light, you’ll need to use a faster shutter speed to avoid overexposure.
If you want to capture motion with a slow shutter speed, you may need a small aperture (high f-stop) to avoid letting in too much light.
Understanding how to balance these settings will give you creative control over your images, allowing you to decide what elements of your scene should be sharp, how much motion should be visible, and whether the exposure is bright or dark.
Practicing at Home: How to Master Aperture and Shutter Speed
You don’t need a professional studio to practice aperture and shutter speed. Here are some exercises you can do at home to improve your skills:
Exercise 1: Experimenting with Depth of Field (Aperture)
Set up a simple subject, such as a plant or an object on a table, and place it near a window or light source.
Step 1: Set your camera to Aperture Priority mode (A or Av). This allows you to adjust the aperture while the camera automatically adjusts the shutter speed.
Step 2: Start with a large aperture (e.g., f/2.8) and take a shot. Notice how the background appears blurred, while the subject remains sharp.
Step 3: Gradually increase the f-stop (e.g., f/8, f/11, f/16) and take photos at each setting. Observe how more of the scene comes into focus as the aperture becomes smaller.
This will help you understand how aperture affects depth of field and how it can be used to either isolate your subject or create a sense of depth.
Exercise 2: Capturing Motion (Shutter Speed)
For this exercise, you can use moving subjects like cars on the street, water from a tap, or even a fan.
Step 1: Set your camera to Shutter Priority mode (S or Tv), where you control the shutter speed, and the camera adjusts the aperture.
Step 2: Start with a fast shutter speed (e.g., 1/500) and take a photo of the moving subject. You’ll notice that the motion is frozen, and everything appears sharp.
Step 3: Gradually slow down the shutter speed (e.g., 1/60, 1/30, 1/5). Take a photo at each setting and observe how motion starts to blur, creating a sense of movement in the image.
This exercise will help you learn how to control motion in your photos and create dynamic effects.
Challenges You May Encounter (And How to Overcome Them)
As a beginner, mastering aperture and shutter speed can feel overwhelming at first. Here are some common challenges and how to address them:
1. Overexposed or Underexposed Images
When first experimenting with manual settings, it’s easy to end up with photos that are too bright or too dark. This happens when the exposure triangle is not balanced. If you’re adjusting aperture or shutter speed and getting inconsistent results, try the following:
- Solution: Practice using your camera’s exposure meter (the +/- scale in your viewfinder) to ensure that your settings are balanced. If the needle is too far to the positive, your image will be overexposed; if it’s too far to the negative, your image will be underexposed.
2. Blurry Photos with Slow Shutter Speeds
Slow shutter speeds allow more light in, but they also make it easy for your images to turn out blurry, especially if you don’t have a steady hand or if your subject is moving.
- Solution: Use a tripod or place your camera on a stable surface when using slow shutter speeds. Alternatively, you can increase your ISO slightly to allow for a faster shutter speed without compromising the exposure.
3. Difficulty Achieving the Desired Depth of Field
Achieving the perfect depth of field, especially in low-light conditions, can be tricky. If you’re trying to shoot with a small aperture (like f/11 or higher), you may find that your images are too dark or blurry due to slow shutter speeds.
- Solution: Consider adjusting the ISO to a higher setting, which will allow you to use a smaller aperture without reducing the shutter speed too much. Alternatively, use a lens with a larger maximum aperture to let in more light when necessary.
4. Balancing Motion and Sharpness
When capturing motion, especially in low-light situations, you might struggle to find the balance between freezing motion and keeping your photo well-exposed.
- Solution: In low-light environments, use a faster lens (with a large maximum aperture like f/1.8) to allow more light in, enabling faster shutter speeds without sacrificing exposure. Additionally, raising the ISO can help maintain proper exposure while freezing motion.
Conclusion
Mastering aperture and shutter speed is key to gaining creative control over your photography. While these concepts may seem complex at first, with practice, you’ll be able to use them to create images that capture your unique vision. Start by experimenting with aperture and depth of field to understand how it affects focus and bokeh, and work with shutter speed to freeze or blur motion depending on your artistic goals.
Remember, every great photographer was once a beginner. Keep practicing, learn from your mistakes, and soon you’ll be confident in using aperture and shutter speed to capture stunning, well-exposed photos!
As a wedding photographer, understanding the physics of light is crucial for capturing sharp, well-lit images. Light affects everything in photography, from exposure and focus to depth and mood. Knowing how light interacts with your camera s settings—such as aperture and shutter speed helps you balance natural and artificial lighting in any environment. This understanding allows you to adjust for harsh sunlight, dimly lit venues, or golden hour magic, ensuring your subjects are beautifully illuminated and every detail is sharp. Mastering light is key to delivering stunning, professional-quality wedding photos. Do checkout my gallery for the Wedding Photos, to get some inspiration of images captured under natural and artificial light.
Discuss your photography plans
Varun Verma
I'm Varun, a passionate photographer who loves capturing life's real and beautiful moments. From weddings to family portraits, I focus on creating timeless, authentic images that tell your story. My goal is to preserve emotions and memories, so you can cherish them for years to come. About Varun Verma
Popular Posts
-
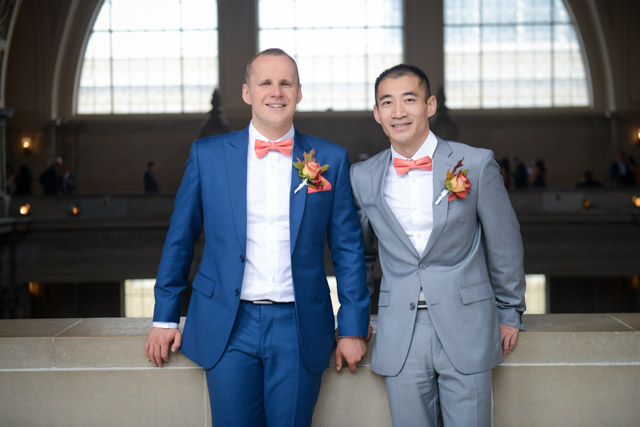 The Ultimate Guide to San Francisco City Hall Wedding Photography
-
 Welcome to My Photography Blog: Capturing Moments that Last a Lifetime